Tag Archives: Vogue 2885

Vogue 2885 Jacket: Part 2

Coming to you, courtesy of a once-in-a-lifetime Homework Free Weekend:

The Vogue 2885 Jacket!

(I’m sorry about the strange lighting in these photos.  It was amazingly light when I was photographing and it washed out the color in some of them. :( )

Some of the making up instructions were a little odd, but I followed everything to the letter.  I figured that I can add my own spin the next time I make the pattern.

Let’s start with the sleeves:

Both the fashion fabric and the lining have these gathers at the inside elbow.  This is a design element I’ve never seen before.  It might be practical, since when I wear it the sleeve moves with my arm very well, or it could be purely for looks.  It’s a puzzlement.

Another puzzlement that was terribly frustrating was the fact that the lining sleeves were sewn on after the rest of the jacket had been put together.  That means by hand.  I usually use my machine to ease the sleeves into the arm holes, so sewing one on by hand was a little unthinkable.  I did it, though, I’m proud to say.  It took me forever, but I did it.  I’ll say this though – I’m not going to intentionally hand sew sleeves on ever again.  ;)

Then, the back pleat:

I love the way this turned out.  It’s one of those touches that just exemplifies the 40’s look.

And, one more look at the glorious pad-stitched collar in it’s final form:

My closure of choice:

Lovely leather buttons that are so smooth and nice.  I was considering covered buttons, but while digging around in my notions box for the forms, I saw these and knew they were perfect.  I bought them a while ago when I made my brown corduroy vest (before my bloggy days) as an option for closures, but decided on something else.  So, these beauties languished in the notions box until now.  They have happily found a home.  :)

Now- on to the pink taffeta lining:

I am totally hating these buttonholes (especially on the inside).  This is one of those quirky methods I referred to above.  I have done bound buttonholes several times before – but I’ve never seen a method as hard to accomplish as this.  The fronts were quite easy, but the inside parts involved cutting a slit above where the buttonhole was on the other side.  Then, turning the raw edge created by the slit under and slip stitching, exposing the buttonhole to the inside.  It was hard to keep smooth (you can see that it puckered a little) and it was a handful while I was trying to hand sew the opening shut.  Next time, no matter what the pattern says, I’m trying Paco’s method on buttonholes that I just found today via the amazing Tany.  I like to learn as many sewing methods as I can, so that’s why I didn’t want to just discard the pattern instructions.   However, it does burn me up a little that the method wasn’t as finished looking as the rest of the jacket.  Ugh!

On to happier adventures –  the bar tacks!

This was my first experience bar tacking and I truly enjoyed it.  (Yes, that’s my sadly red thumb with the polish down there.  My hands are all dry from the cold, so they won’t exactly be in any adverts any time soon!)  There are 10 bar tacks in the lining of this jacket and I got them done in about an hour.  They look so professional!  (Sorry for that stray little thread there – my zeal for sharing got the better of my perfectionist side!)

Back view – It has a terrific silhouette, don’t you think?  Now all I have to do is invent a special occasion so I can wear it!

Overall, I’m so happy and proud of it.  If you had told me back when I was a little girl sewing stuffed bears that I would one day be able to sew this, I wouldn’t have believed you.  Goes to show how far you can come.

I wish you all a lovely day, my friends!

23 Comments

Filed under Fashion Backward, Sewing

Vogue 2885 Jacket: Part 1

I’m not finished with it yet, but here’s a little sneak peek at my Vogue 2885 jacket.

Bound Buttonholes:

Pink Taffeta for Lining:

I’m hoping the taffeta will give my jacket more body because the suiting fabric I chose is stretchy and a little flimsy.

And…Pad-stitched Collar!

Pad-stitching was completely new to me when I saw it listed in the instructions.  I had to do an extensive internet search to get enough info to figure out what I was supposed to be doing.  I hope my research will be useful to others looking for guidance.  Be reassured, pad-stitching is not as hard as it looks or sounds.

1st source: Ann’s Fashion Studio – I found this post that was a goldmine of technique and provided the one I ended up using.  The idea is to draw a grid on the interfacing of your collar or facing and use it to direct the stitching.  I believe it was originated by Roberta Carr.  (I’m gonna have to find some those DVDs that Ann mentions in her post!)  I free handed a grid on my collar according to the Vogue pattern instructions.  I needed to have tighter stitching on the collar stand and wider stitching on the wings.  That meant smaller grid boxes on the stand portion and larger on the wings.  (The yellow basting on my collar is the divide between the collar stand and the wings.)

Then, I actually had to take up the needle and thread.  One of my most terrifying moments during the process of making this outfit.

2nd source: Vintage Sewing.info – This site helped me to form a mental picture of what my stitching should look like.  The idea is to have miniscule stitches on the right side of the fabric and large, supportive V stitches on the underside.  The concentration of stitching strengthens the fabric and gives it a body it wouldn’t ordinarily have.

3rd source: Couture et Tricot – Tany’s post on pad stitching was incredibly helpful for me to see how my collar was supposed to look.  Her example is almost exactly the same shape as mine, so it gave me a much better understanding of my goal.

4th source: Sewing Pattern Review.com – I found this discussion on a message board with a helpful tip from someone named Tom P about steam pressing the collar after you finish pad stitching.  I followed the advice, and my collar stands beautifully.

I encourage you to give pad stitching a try.  It’s very worthwhile for the strength of a collar and it gives you a great sense of accomplishment to know that you mastered a technique of the vintage dressmakers and tailors.  It gives your garment a true vintage feel.  I even found it relaxing to use the needle and hand sew the pad stitching.

Coming up… finished photos of the Vogue 2885 jacket!

6 Comments

Filed under Fashion Backward, Sewing

Fashion Backward: Vogue 2885 Skirt

skirt-sweater-frontSkirt’s all done!

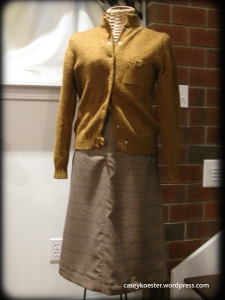
It’s pictured with one of my favorite sweaters.  I think it looks very 1940’s.

Here’s a closeup of this plaid fabric:

plaid-fabric

When I bought this fabric some 6 months ago, I wasn’t sure if I really liked it.  But, I have decided that it’s quite perfect for this skirt pattern.  I was worried about matching the plaid and terrified that if I didn’t match it just right, the skirt would end up looking clownish.  I think it worked well though.  I agonized long enough about it! ;)

waistbandOne of my most favorite design elements about this skirt is the notched waistband.  I thought it would be hard to get this to look right, and knew it was a spot of potential danger.  But, actually the instructions were wonderful and I had no trouble with it.

I did have some trouble with the zipper.  I’m not really sure why, either.  It was supposed to be covered with the lapped side of the skirt.  Somehow, mine is just in the side with no lapping.  The pattern did not call for an invisible zipper, so I didn’t use one, although now I’m wishing I had.  Ah, well – we live and learn.  It doesn’t look bad, it’s just a matching zipper.

skirt-backThe back has a deep pleat with an underlay.  It’s a nice vintage touch.

This skirt is a little longer than I usually wear them.  I like my skirts to be just above the knee and this one falls just below the knee.  I’ve decided to wear it a couple of times and see if I have feelings of absolute hatred for this longer length.  If I do, I can adjust the hem, but I hope I don’t.  I dislike hemming.

I’m cutting out the fabric for the jacket right now.  It’s a deep brown stretch suiting.  I have four days left of break, so it’s a race now!

My sincere thanks to everyone who expressed interest and wished me luck on this venture.  Your comments are greatly appreciated!

6 Comments

Filed under Fashion Backward, Sewing

Fashion Backward: A Hurried Vintage Vogue Suit

One glorious week of break before school starts.

And, instead of resting (as I should be) I have decided that I must have this suit before my break is over.  It’s a holdover from my summer sewing projects and I simply ran out of time when I was going to make it.  I have all the fabric and the notions and I’m going to be sewing away trying to finish it before I go back to the daily grind of homework, due dates and papers.

I’m currently working on the skirt and have it almost complete.  The front and back are sewn together and I’m working on piecing the waistband.  I hope to have a finished product tonight.  The jacket is a little complicated and time consuming, but I’ll manage.  It’s not my first jacket and it’s not fully lined, so that will save some time.  I’m quite determined – to quote my favorite heroine, Elizabeth Bennett.

Wish me luck!

9 Comments

Filed under Fashion Backward, School, Sewing