
 Well hi there, friends!
I come to you today with a fabulously exciting collaboration between the prolific milliner Tanith Rowan and I. I stumbled upon Tanith’s blog in late July and became enamored with her monthly Whimsy project and stunning handmade hats. She announced in her newsletter an idea for creating a set of vintage-inspired Halloween costumes and I jumped at the chance to be a part of it. We exchanged general ideas and set about sketching in the beginning of August. In all, we both came up with 10-12 individual designs and then we narrowed down to 3 for production. And that narrowing was no easy feat. I would happily make every one of Tanith’s designs. Oh and her fashion sketching? Puts mine to shame, folks.
Tiny sidenote – as you look at these, bear in mind the fact that the garments were all sewn in a 32 square foot space. On my kitchen table. If you think you can’t sew because you don’t have room – don’t let it stop you. It can be annoying, but it’s possible and remarkable fun.
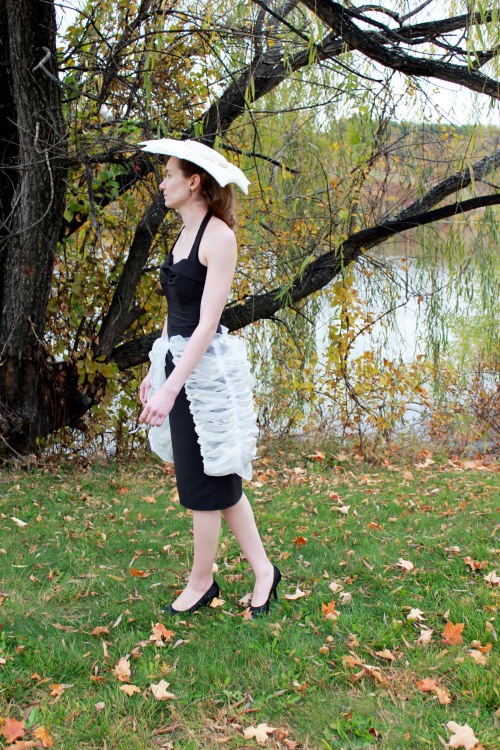
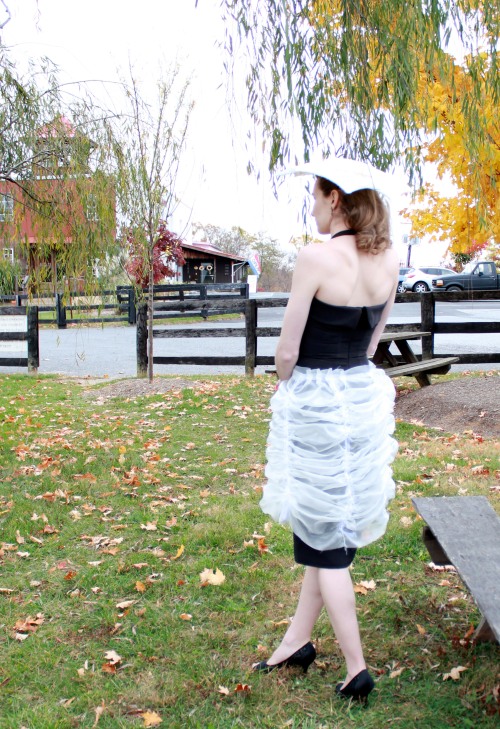
1950’s Spider
 First up – a 50’s sheath dress and gathered overskirt with a wide brimmed sun hat. Tanith’s take on the hat is a stroke of genius. Inside the brim, she hand cut felt spiders and hid them between the sheer layers, so they are only visible when the light shines through the brim in the right way.

 For the dress, I used Gertie’s Tiki Dress pattern from her book and made it up in dark grey bengaline. I didn’t gather the skirt as she instructs, though. I just used the simple pencil skirt instead. Of all the pieces for this project, I expected to have the most trouble and be the most frustrated by this one, just because of the complex nature of the construction and it being my first time using boning in a garment. It went together smoothly, to my great surprise. I even lined it! The “web” overskirt is self-drafted and made of creamy sheer. It’s loosely gathered using a technique I used last year to make an Anthropologie inspired duvet cover.
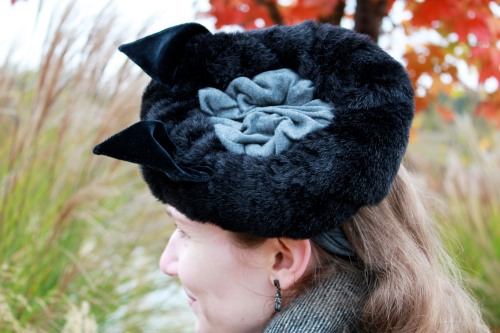
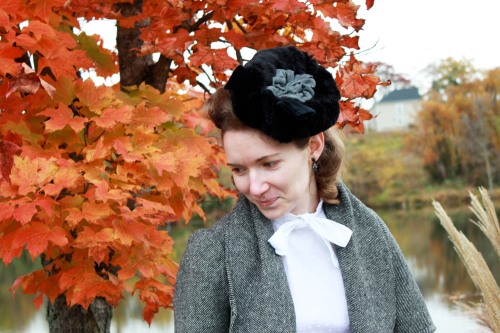
 1930’s Cat


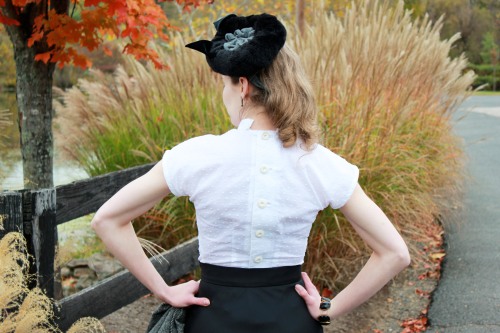
 Next, a 30’s day outfit with a long skirt, bow-tied blouse and short cropped jacket. Tanith’s hat is a crown of fur with a knit fabric carefully gathered across the center and two velvet ears on the edge. By the way – a note about Tanith’s remarkable hat designs: she knows what a hat needs to help it stay on all day. For this hat, she built in a plaited bandeau that wraps around the back of your head to keep it in place. My hair mostly covers it in these photos, but trust me, it’s there.
 The skirt here is Wearing History’s 1930’s Bias Skirt pattern. I tried the print at home version and have never been so impressed with a print at home pattern. Lauren took great pains to make the matching of the pieces easy and she succeeded. If you were on the fence about trying any of her patterns, I highly recommend them (and no, she did not ask nor pay me to say it).
The blouse is Gertie’s Bow Tied Blouse (from the book above) made in cotton dotted Swiss. For some reason, this one item was the hardest and most frustrating to complete. I wish the pattern pieces from the New Book for Better Sewing were numbered or lettered somehow because I spent a whole hour convinced I did not have the pattern piece for the collar. It’s called a Collar Band in the pattern and it confused the heck out of me. The directions for sewing are a bit vague, too. If you are not an experienced sewer, they will be hard to follow. Anyway – the back is closed with 5 bound buttonholes and finished with vintage buttons. Gertie’s bound buttonhole instructions are my favorite bar none. If you are looking to attempt them, check out her tutorial in this book. In the end, I’m quite pleased with the result and will be making the blouse again.
The jacket is self-drafted with a big wide collar to give a proper backdrop for the bow on the blouse. The jacket fabric is vintage gray wool a friend gave me and it was perfect for this use. It’s been waiting on my fabric shelf for just such a project.
Of the three outfits, this is my favorite. And as Tanith said in her post, I love them all!
 1940’s Bat


 The final outfit is a 40’s batwing suit made of houndstooth brocade. Tanith’s beautiful rendition of this hat blew me away from the moment I unpacked it. It’s another example of her thoughtful practical-ness, too. Inside, there are two elastic loops you bobby-pin to secure it.
 I initially intended to add directional quilting as you can see from the sketch, but when I found the houndstooth fabric, the quilting seemed like it would interfere. This design also has a back closure and no, the back closure theme was not intentional. The lines of both designs just seemed to fit with what we were going for. The pattern used for this outfit is Simplicity 1706 from the 40s. The buttons are another set of vintage beauties waiting for the right project to come along.


 I am so honored to have worked with Tanith on this endeavor. She is a lovely person full of ingenuity, talent and brilliance. Make sure you go check out her post on this project over at her blog and while you’re at it, look at her Whimsy project, too!
Also, I’d like to extend my sincere gratitude to my dear friend Mrs. T who kindly dropped everything to take off on a photoshoot adventure with me at a moment’s notice. She snapped all the photos here and did a truly wonderful job. I love you, dearie.